Sunday, March 30, 2014

Isabelle LaRoux: A Flashing Steel Prequel


Game night tonight became pretty sparse for players, as several in the group bailed at the last minute.  That left Kenny, Terry and myself to carry the night.  I decided to scrap my initial offering and take the campaign in a different direction.  The crew's newest member, Isabelle LaRoux, is a bit of a mystery to the crew.  Why not give her a back story?   

A little history now can be used later in the campaign for plot purposes, so I quickly made up a plot and off we went...back to 1714 in the Caribbean.

From the musings of Isabelle LaRoux (Anglicized from her West indies patois):


I was once a favored crew member of Captain Bonefist, the feared pirate.  He was a stern captain, one part anger and one part generosity.  If you were true to him, he was true to you.  Break his rules and you were dead.  That was the way of life on his ship.


We were on an island in the Fingers, burying some of the Captain’s loot.   There was the Captain, Cook, the Bosun, a couple of sailors and myself.   

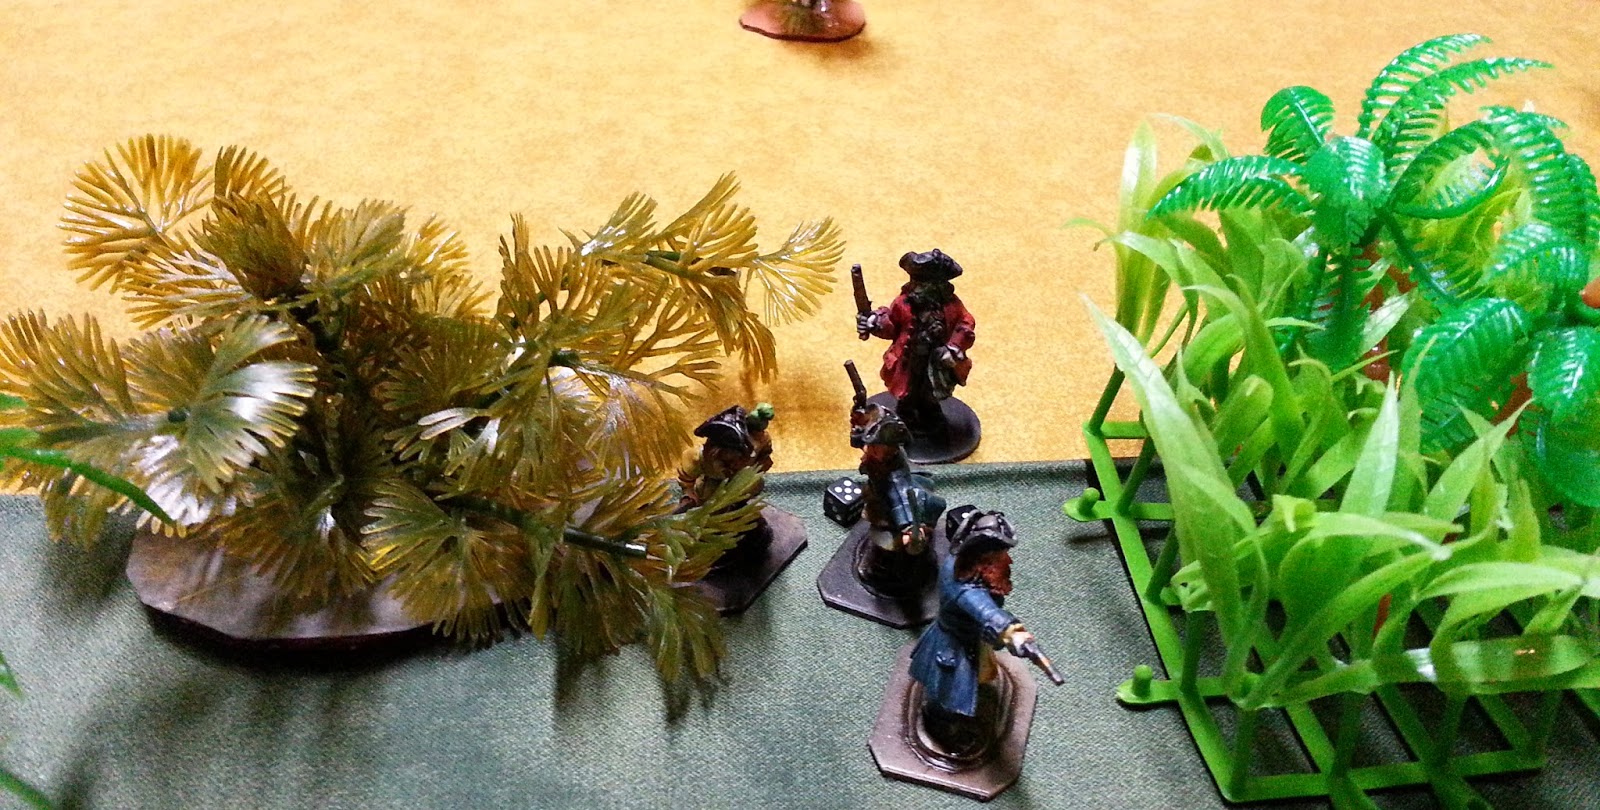
Bonefist and Isabelle
 

The Bosun and swabs, with Cook in the background
 Things were going well and the sailors had dug quite a hole for the chest we were planning on depositing.  The sun was hot…so much so that the Captain and Cook, seemingly always at Bonefist’s side, were lounging in some shade not far from the dig site.

That's when things went wrong.  An unknown band of sailors were seen by the Bosun and the swabs.  They drew their pistols and found cover in the hole, while the Bosun ran toward Cook and the safety of a large bush.


One of our sailors shot one of theirs, dropping him quick-like to the sands.  The rest kept coming, though, and it was soon blades and blood in that hole. Our boys did what they could and I took any shots in that direction as were available.  I downed their captain, but he popped up again, looking no worse for wear.  


It would have been an easy fight, but for a couple of things.  First, Captain Bonefist stayed back and drank his ale, calm as you please.  He didn't even seem surprised by the attack.  Second, another crew from another ship came at us, splitting our attention and bullets.


The Bosun, seeing this second threat, ran for cover on their flank.  As they drew near, he drew arms and gave them his steel.  It was bloody work and the battle soon made its way to my shelter.  We felled their captain, but the vermin ran away, regrouped and renewed the attack.  Cook threw one of his infamously deadly cleavers into the back of one sailor that was creeping up on me, but otherwise he and the Captain contented themselves with watching the fight unfold.
 

It was only a matter of time before their overwhelming numbers won the day.   Our sailors were finally slain, leaving the mystery crew a treasure to take back to their ship.


I caught the flat of a blade to my head and was knocked senseless to the sand.  I was told later that the Bosun, Cook and Bonefist fled the scene without so much as an attempt to save me.  So much for loyalty, hey?

I was taken to the captain-less ship, where the crew grumbled about losing out on the treasure and having a female on board to boot.  A new captain was chosen...a fellow by the name of...well, it doesn't really matter now, does it?  

We were two days out from the island of my capture when we ran across those damnable dwarf pirates and their 'submersible'.  The little bastards cored the ship, killed the crew, looted her and took me for their own vices. 

I must've been ill luck for them, for no sooner had we set sail than their vessel started taking on water.  We had to set down on an island and watch the ship sink for the last time.  Good, I say.  The damned thing was infernally hot and stunk of sweaty, unwashed men and stale beer.  Fish and Davy Jones are the only things that should swim under the waves, I say!

The rest you know.  The little men found some ruins on the island, complete with some sort of underground cavern they quickly changed into my prison.  I'm glad you killed the little bastards...for kidnapping me and for threatening me regarding their 'pleasures'...which they never go to do, thanks to you good fellows.

I do know one thing, though.  I owe a Captain Bonefist and his crew a bloody death.  It's an awfully big sea, but he likes sailing the Fingers.  Beware his ship, though.  It's a monster in its own right.  All I'll say is don't get too close to that behemoth, or you'll be so much flotsam on the waves...It's not natural what it can do to a ship. 


Key to the Kingdom

Played 3/20/14...

Good day, all.  This is a quick AAR of the Secondhand Lion's play of Key to the Kingdom (KttK).

As a bit of background, I try to host twice a month.  One time we feature as a 'board game' night, the other a 'miniatures' night.  This night was of the former variety.

We had a full complement of six players, which proved to be an interesting, but long night of KttK.  Kenny brought over the "dungeon-delving" prize: a brass unicorn!  This traveling 'trophy' will surely be seen in later installments of our group's escipades!

For my part, the game consisted of my character moving toward a location, only to have the treasure taken from it before I could reach the place.  That would then force me to move to another part of the board.  In essence, I spent the whole evening doing nothing but looking like Ozzy Osbourne wandering around his back yard shouting "Karen!".  I eventually camped out near the exit and waited for the person with the key to wander by so I could mug him and win.  It didn't work...

Long story short, there were moments of hilarity as characters failed their rolls in the most spectacular ways to prolong the game.  What should have been an hour-long adventure turned into the entire evening.

Here's the board toward end-game:


Yes, that's me in green, lurking...


Eventually, Terry found the key.  We decided that enough was enough and declared him the champion.

Kenny presented the brass unicorn to Terry...


...who then showed his true champion's spirit.


All in all, you can't call an evening with friends, my wife's awesome 'crack corn' and beer a bad one...


Thursday, March 13, 2014

Tutorial: Cheval de frise


If you happened to read my previous post, Tutorial: Floors and Rails, you may remember that I had several 2" toothpick ends (the sharp bits) left over from that project.  Even though I didn't have anything specific in mind when that occurred, I knew I could use them to create some additional tabletop terrain. 

I had the image of a cheval de frise (chevaux de frise is the plural form) in my mind, but I didn't know what they were called.  I called my friend Kenny, who almost immediately sent me a picture of what I was looking for.  A little web-fu and I had the name.

For those who are interested in the trivia tidbits and historical parts of wargaming, the cheval de frise was originally conceived to counter cavalry charges.  It was soon discovered that humans didn't like them, either.  They were used up to and during WWII, when barbed wire replaced them as an effective infantry barrier.  During the ACW, the South used chevaux de frise quite extensively, especially when compared to the Union.  For us, these can be used for fantasy, medieval, sci-fi (with barbed wire on top) and modern conflicts.  A truly multi-genre piece of terrain!

What you'll need:  Toothpick ends, a round or square craft stick (I used a square 1/4" x 36" stick from either Hobby Lobby or Michaels), white glue (I like Aleene's Tacky Glue), a drill (optional), a work area you can drill on (optional), string/twine (optional) and a sharp razor blade.

Step 1:  Cut the ends off your toothpicks.  Here is the brand I used.  You don't have to be that fancy, but you do need round toothpicks.


The toothpick in this picture still has its head on it, but a quick snick from a razor blade cures that!


Here's where you can choose one of two ways of creating a cheval de frise.  I'll mark them "a" and "b".  The "a" options will feature drilling.  The "b" options will not. 

Step 2a:  Starting 1/4" in from the edge, mark a drill hole in the center of the wood every 1/2".  Flip one side and repeat the process, but alternate the marks so that you have a mark every 1/4".  A 4" piece will have 15 "shafts" when it's all finished.  Obviously, a round dowel rod will be very hard to drill in this manner unless you have a clamp of some sort when drilling.


Step 2b:  Mark the wood as in 2a.  Instead of dots, make straight lines to use as guides when gluing on the 'shafts'.

Step 3a:  Drill straight through the wood at your dots.  Be sure the drill bit matches the diameter of the toothpick!  Too large a hole and the toothpick will fall through.  Too small and the toothpick won't make it through the hole.  Slot the toothpicks through the holes on both sides, making sure they're even and at the length you want.  Put a dab of glue on the bottom side of the shaft/crosspiece junctions (i.e., the 'dull', not pointy side), as it won't be seen on the table.  Let dry.

Step 3b:  Smear glue along the marks on one side of the wood.  Set your toothpicks in place, making sure they're even and at the length you want.  Let that side dry, then repeat the process on the second side.  You may have to hang the piece off the table to accommodate this part, as your completed row will get in the way.  Again, let it dry.  If you want to look really authentic, you can simulate the 'shafts' being tied to the crosspiece by looping and gluing twine/string around the junction of each shaft.

Step 4:  Depending on how you want your pieces to look, you can paint, stain, weather, etc the wood to suit your needs.  My pictures feature 'raw' wood versions, as I haven't decided how I want them to look.  Blacken the ends to make them appear like they were fire-hardened?  Paint them in a gray-brown to show they've been around a while?  Leave them in the 'nude' to indicate they are new works?  Oh, the possibilities!

Voila!  Chevaux de frise!  Be careful!  These suckers are SHARP!!!


As always, I hope this tutorial helps you create an awesome table! 

Tutorial: Floors and railings

It has been a little while since I posted anything, so I thought I'd get back into the swing of things with a tutorial.

There are many times when I've found the need for a wooden floor.  Ship decking, regular flooring, a second story in a model building...the need does arise.  Along with this need, I occasionally have to make accompanying railing.  After all, you don't want your miniatures to fall off when the ship, second floor, etc are moved!  Also, I like railings to add a touch of realism to the terrain.  A wargaming win-win in my book.

If you've followed this blog (instead of chancing upon this page), then you may remember the western shootout set in a trading post/lodge.  I wanted to finish that piece, so I inked it, built a couple of walls to create rooms and added a second floor.

It wasn't until I finished that project that I thought about blogging the creation of floors and rails for the second floor.  Blame it either on me being on Spring Break and thus mentally relaxed, or the fact that I'm also confined with my two darling, but really rather distracting children.  Or don't.  Whatever.  I digress.

What you'll need: a sharp razor blade, a mechanical or sharp regular pencil, balsa wood that is large enough to use as your desired floor, toothpicks, craft sticks, hand drill, a ruler (preferably clear), thin cardboard or matte board large enough to go under the balsa wood as reinforcement, white glue (I use Aleene's Tacky Glue), scissors, paints, stains, etc of your choice, self-healing cutting board or comparable surface.

Step 1:  Figure out the dimensions of the floor you'll be creating.  If your balsa wood isn't wide enough, keep in mind that you can put pieces side-by-side as long as you keep the wood grain heading the same direction.  Mark and cut with the wood grain.  Remember to use your self-healing cutting mat, or at least cut on a surface you don't mind scarring!  Your razor blade is merciless...wood, flesh, mat...it'll cut 'em all!

Step 2:  Take your ruler and mechanical pencil.  Again, look at the direction the wood grain is going.  When you etch the balsa wood, you'll want to go with the grain, not against.  As you can see in the following picture, my ruler is clear acrylic with measurement lines, which makes lining up my etches a piece of cake.  If your ruler isn't as functional, I've found 1/4" to be the ideal width for 28mm 'wooden boards'.  The reason for using a mechanical pencil is simple: The lead easily scores the balsa wood, but not so deeply that it cuts it entirely apart.  It also leaves a nice dark line that instantly gives your floor some depth.


Once you've gone across the floor, your piece should look something like this:


When you add the cross etches, simulating the edges of boards, remember to etch every other line.  For instance, in the picture above, I may start with an 'end etch' in the middle of the bottom board, then continue it on boards 3, 5, 7, etc.  I'd then put another 'end etch' on the left side of board 2, then 4, 6, etc.  The pattern looks great when finished.   Of course, you could also completely randomize your 'end etches'...just make sure that your board lengths are the same.  No bad carpentry, even in miniature!

Step 3:  Creating the spindles for railings is simple, really.  It all depends on how fancy you want to get.  In my case, I have a bunch of toothpicks with ends that look like turned spindles.  The shaft of these toothpicks is a little bigger in circumference than the cheaper versions, but as you'll see, that doesn't matter.  Here are the toothpicks I'm using:


As you can see, the tops of these little guys are perfect for spindles.  Since I'm not wanting the entire toothpick, I cut off the top 1/2", making sure that I keep the shafts for future projects.  Waste not, want not, right?


When you've cut a goodly amount of these bad boys (30ish), it's time to move on.

Step 4:  I have a handy hand drill.  It's a little expensive, but very useful.  Its use today is to pre-drill holes in the balsa wood so I can anchor my spindles.  Knowing that balsa wood splits easily, I try to drill far enough from the edge that it isn't an issue.  I drilled about every 1/2", all the way through the balsa.  I'll be honest and say that I eyeballed distances.  When push comes to shove, the effect is what I'm wanting.  Most gamers won't criticize if you're off by a smidgeon.  


I dry fit the spindles to make sure the holes work, then I put a dab of Aleene's in each hole.  Put the spindles back into the holes, making sure that they are the same height.  If you don't, then your railing isn't going to lay right.  Let 'em dry.  Aleene's turns clear when dry, so it's easy to tell when the piece is ready for the next step.

Step 5:  Railings.  I have an assortment of craft sticks on hand.  I think the ones I used for this project were actually stir sticks from Starbucks or some similar coffee joint.  I cut off the ends with scissors, then using my razor blade and mat, cut them lengthwise in half.


You can see that the cut piece isn't perfectly straight.  That's fine for my lodge project, as they're for a log cabin and not a modern home.  Otherwise, please pay attention to your craft sticks' straightness and if there are any knots in the wood.  Knots can be a pain to work around!

Cut the 'railtops' to the desired length.  Place a dollop of glue to the top of each spindle and place the railtop in the desired position.  Let dry.

Step 6:  Cut the thin cardboard or matte board out in a shape that is slightly smaller than the surface area of the balsa wood.  You want to make sure the piece is small enough be on the inside of your drilled holes, but still large enough to effectively strengthen the balsa.  I learned this the hard way.  I attached my cardboard before drilling, shaped big enough that the holes were messy.  The result? The undersides of my lofts are ugly and caused me some fit issues when I was done.

Step 7:  Paint, varnish, stain, ink wash as you see fit.  You're done!  Here is how one of my second-story lofts turned out.  Note the patterning of the board ends.  If you didn't understand what I meant in Step 2, the pics may help!


I hope you get something out of this tutorial.  Happy building!

Saturday, March 1, 2014

What's a "Submersible"?

Captain's Log 27/2/1714

We had the strangest encounter today, with mixed results for the crew and our hunt for Haworth's treasure. 

We sailed across a Southeastern wind to an island south of Ape Isle.  It was fortunate that the wind was constant, although clouds were scudding into view as we dropped anchor and set the landing boat in the bay.  Landfall was uneventful.  As per usual, nobody greeted us on the beach.

 
Trekking inland, we finally saw an inhabitant as we breached the jungle interior.  A burly, shirtless dwarf sailor eyed us from some ruins.  He didn't advance, so we clustered amongst the foliage and eyed him back.


As we further entered the canopy, more ruins and dwarfs were revealed.  We were hailed by a rather foppish looking dwarf standing by an opening in the ruins to...something...below.  He asked us our business, which I told him outright.  He stated that Haworth's treasure was the property of the "Dwarf Nation" and then asked me a rather odd question.  "Do you know what be a submersible?" 

I was clueless as to what the diminutive fellow was talking about, but my bosun, who was standing at my side, glibly recommended I answer in the affirmative.  I passed off the question as one that was common knowledge, which seemed to perplex and perturb the fop to no end. 

Words became rather short at that point and resulted in gunfire emanating from the bushes behind and to the side of the ruins.  My bosun and "Lucky" Bill were left hugging the earth as the aforementioned burly dwarf and a similar compatriot rushed us.  Their charge was shortened by return fire and a well-placed melee attack.


Neither the bosun nor Bill were harmed in the exchange, but the flintlock-wielding foe needed to be dealt with sharpish.  We managed to chase one toward the hole in the ruins, which the fop and the other gunner had fled down.


Outnumbered and unloaded, the poor little man stumbled backward into the hole, his fate unknown by us.  The ladder was then quickly pulled down into the hole, denying us easy access to the wee ruffians below.

We decided, after much discussion, that we would jump down into the hole and finish this ugly business.  This proved to be where our luck ran out, of sorts.

First down the hole was the bosun, who promptly fell as he turned an ankle on the corpse of the gunner laying on the ground.  Unhurt, he was nevertheless in the way of the rest of the party following in his wake.  I fell down as I landed on the bosun.  Ol' Bloody proved more spry and avoided collapsing as well.  Poor Lucky tripped as he dropped, hit his head on a stony outcrop and was instantly knocked unconscious.

The dwarfs, stunned that we followed them into the hole, watched agape as we untangled ourselves.  Bloody killed the shooter, but that left the fop time to charge into melee with the bosun.  We quickly surrounded the little man and felled him with savage blows.


A search of the chest in the corner yielded both 50 gold and a second piece of Haworth's map.  As we prepared to leave, a voice hailed us from the grate by the exit.  A female prisoner!  Her name is Isabelle LaRoux and she was shanghaied by the dwarfs for some unknown purpose.  She is a wickedly-tongued lass, but appears able in both pistol and intent.  Woe to he that crosses her path, as murder glints in those brown eyes!

We carried Lucky back to the ship, where his head injury was tended.  He's conscious and moving, but his wits seem addled.  His temperament wavers more than a compass needle in a lightning storm.  He'll need be watched during further landing encounters. 

All in all, the excursion was profitable.  Money, map and new crew are always welcome on such an adventure!

Captain Beefheart